ATL Project Creation
1. Introduction
I was new to COM/DCOM programming when I started learning this "old-fashioned"
technology a month ago. I found it was very hard to find helpful tutorials on the
Internet. I did find some tutorials out there, but I felt that they were not good
resources to learn from because they were either "too old" or too hard
to re-generate the claimed results. These resources were mostly developed under
Visual Studio 6, they generally focused on some in-depth technical details of COM/DCOM
and were not written for absolute beginners.
This tutorial has three goals: firstly, developing COM/DCOM server/client under
the latest development environment; secondly, making the implementation as simple
as possible; thirdly, providing elaborate description on the procedure of the implementation.
2. The Simplest Chat Server
This tutorial will create a simple COM-based chat server and a console application
will consume the service provided by the server. The server is the simplest one
I have ever implemented because:
- It is an in-process server. It is loaded into the client's address space and therefore
no proxy/stub is necessary. Proxy/stub are the tools used by COM/DCOM to achieve
communication between server and client running in different address spaces or even
on different hosts.
- The server allows only one client to connect to it.
- The server has only one interface, the interface has only one method and the method
has the simplest functionality I have ever imagined under client/server environment.
By "simplest", I do not mean something like "
void
                        FunctionName(void)
", these kind
of functions are useless for client/server architecture. If client doesn't send
something to server and server doesn't send something back to client, how do you
know whether the two-way communication is achieved? So the method has the following
form:
SimplestMethod(client_send_something_to_server, server_send_something_to_client)
The Server takes four steps to implement.
2.1 Creating ATL Project
A simple shell is created to hold COM object via "ATL project" wizard.
To start the wizard, please follow the steps: click the "File" menu, choose
the "New" -> "Project..." menu item. The "New Project"
window will show as follows.

We choose "ATL Project", input the solution name as "Images"
and click "OK" button to open the "ATL Project" wizard as follows:
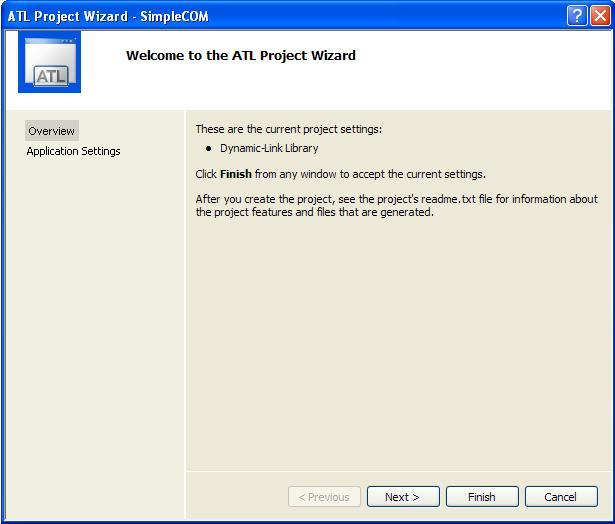
Nothing needs to be changed for the wizard, so we simply click "Finish"
button and let our server code be generated on the fly. Although we don't care about
the details under the hood, there are several things worth being mentioned here.
- The wizard created a DLL.
- The DLL will be registered to the system once it is successfully compiled.
- The DLL provides all the functionalities needed by COM object to function, these
functionalities are common to all COM objects and therefore they are sufficient
for either this simple example or some other more complex cases.
2.2 Adding COM Class to Server
A COM class is a class inherited from a COM interfaces. A COM interface is a struct
(there is no difference between struct and class in Visual C++) inherited from
IUnknown, directly or indirectly. At this step, a COM class and an interface
from which the COM class is derived are generated at the same time.
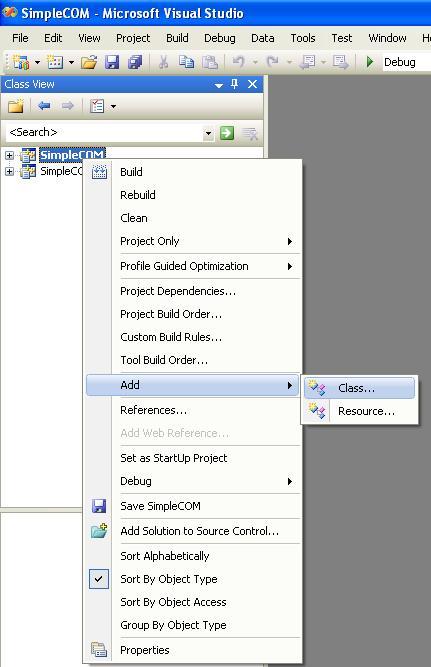
To add a new COM class to the server, open the "Class View" of the project
just created, right click the "Images" project, click
"Add" -> "Class..." to open "New Class" wizard.
The Images class is one of the two "New ATL" wizard generated
classes. The other class SimpleCOMPS is used to create Proxy/Stub and
will not be discussed here.
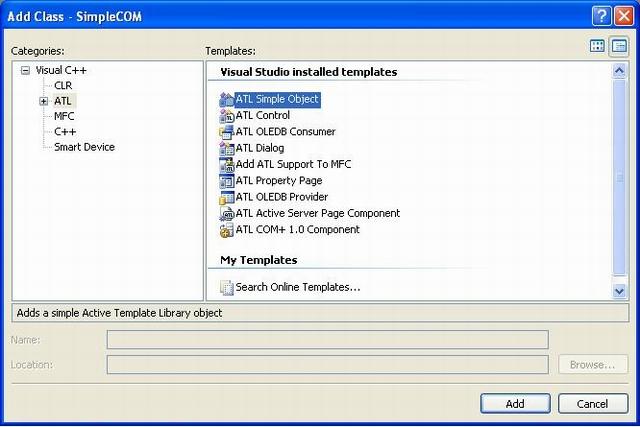
At the "New Class" wizard below, we choose "ATL" -> "ATL
simple object" and click "Add" button.
The "ATL Simple Object" wizard is displayed as below:
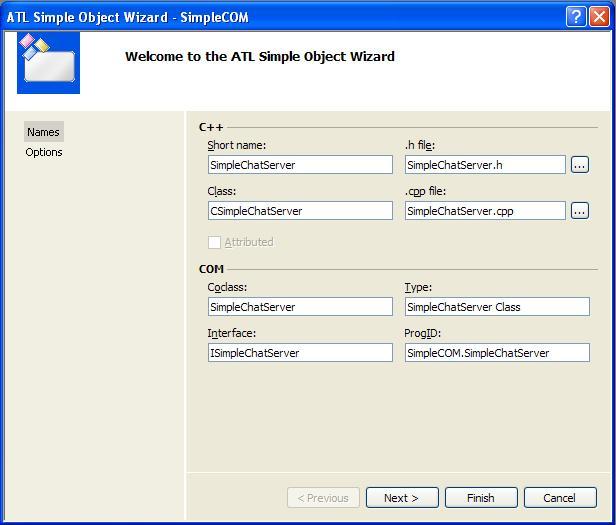
We simply type "SimpleChatServer" in the "Short name"
field and all the other fields will be populated automatically. There is no need
to change these names in this simple example. One thing that needs to be mentioned
here is: at the bottom half of the window, the COM section, we can see that a COM
class "SimpleChatServer" and an interface "ISimpleChatServer"
will be created.
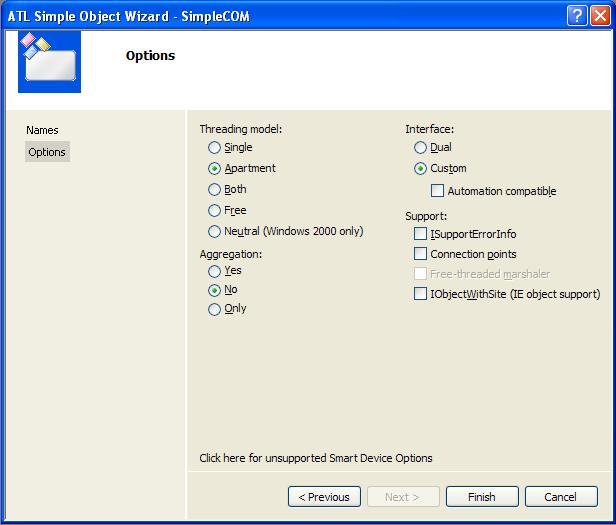
To continue the wizard, we click the "Next>" button and the "Options"
window will show up. We simply set the options of the "ATL object" to
the most commonly used ones as shown in the picture below. There are four categories
for the options and each category worth a whole chapter to explain. As this tutorial
is intended for beginners, what I can tell you at the moment is to click the "Finish"
button at the following screen and close the wizard.
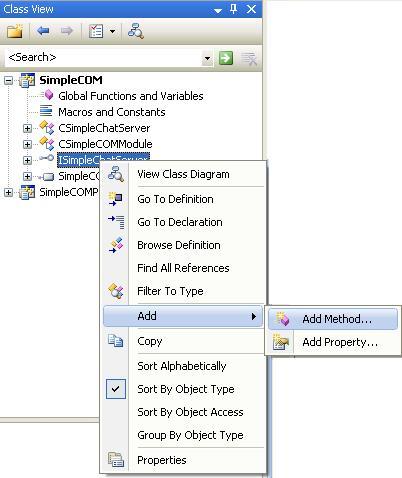
2.3 Adding Method to Interface
In the class view of the project, expanding the "Images"
project and right-clicking the "ISimpleChatServer" interface,
click "Add" -> "Add Method...".
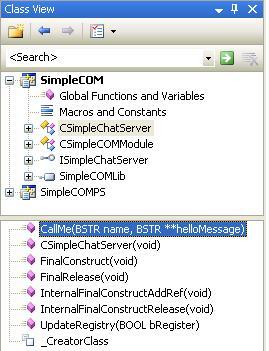
The new method is named "CallMe" and has the following signature:
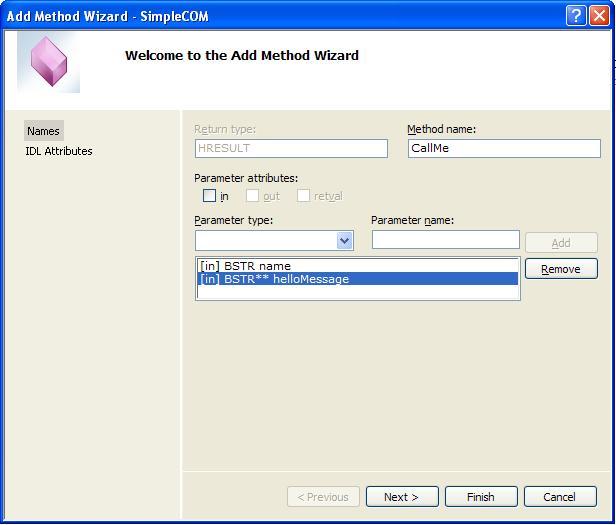
The first parameter "BSTR name" is the name of client, it
will be passed to server when client calls the method. The other parameter "BSTR**
helloMessage" is the message returned to client. The method can
testify whether the duplex communication has been achieved. Click "Finish"
button to go back to class view of the project.
2.4 Coding Method
In the class view window below, choose the COM class "CSimpleChatServer"
at the upper pane and double click the "CallMe" method to
open the SimpleChatServer.cpp file.
At the SimpleChatServer.cpp file, the final CallMe method
is as follows. To include the definition of class "CString",
you need to include the <atlstr.h> header at the beginning of the "SimpleChatServer.cpp"
file.
STDMETHODIMP CSimpleChatServer::CallMe(BSTR name, BSTR** helloMessage)
{
CString temp = _T("Hi
");
temp += name;
temp += ", welcome to
the simple chat server!";
BSTR str = temp.AllocSysString();
*helloMessage = &str;
return S_OK;
}
2.5 Compiling the Server
The compilation of the server is as simple as pressing "F7" or choosing
"Build" menu and clicking "Build Solution" menuitem. Visual
Studio 2008 will compile the server and register the COM class and interface with
the operating system. Consequently, we can find corresponding entries and ClassID/InterfaceID
at the Registry. This information will be used by the client to locate and
consume the service provided by the server, the CallMe() method more
specifically.
3. The Simplest Client
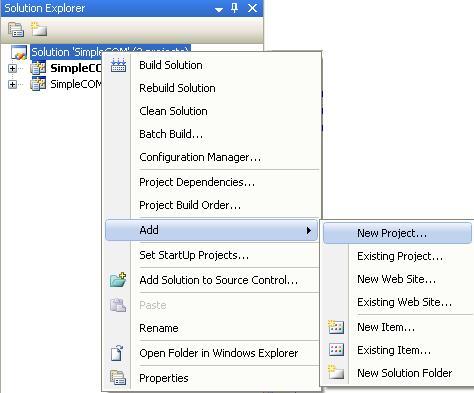
We'll add the client project at the solution within which we created the server
project. To do this, please open "Solution Explorer" and right click the
solution "Images" and choose "Add" -> "NewProject...".
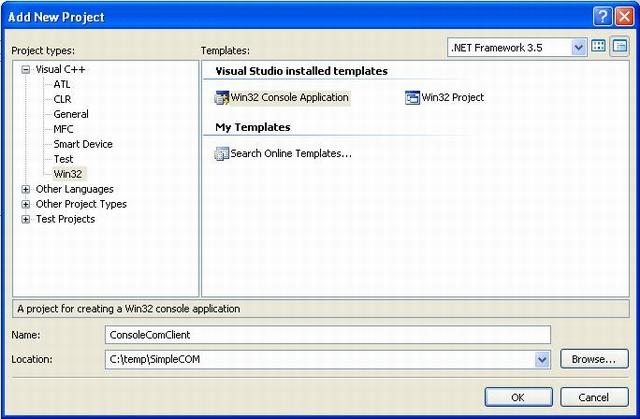
We add a new Win32 Console Application called "ConsoleComClient"
to the solution and click "OK". At the following window, we simply click
"Finish" to accept all the default settings for the new project:
The new Win32 console application is fairly straightforward. The simplest client
takes seven steps. Its code is fully documented, so I simply put the code here.
#include "stdafx.h"
#include "Images/SimpleCOM_i.h"
#include "Images/SimpleCOM_i.c"
int _tmain(int argc, _TCHAR* argv[])
{
BSTR* message;
HRESULT hr;
ISimpleChatServer *chat;
hr = CoInitialize(0);
if(SUCCEEDED(hr))
{
hr = CoCreateInstance(
CLSID_SimpleChatServer,
NULL,
CLSCTX_INPROC_SERVER,
IID_ISimpleChatServer,
(void**) &chat);
if(SUCCEEDED(hr))
{
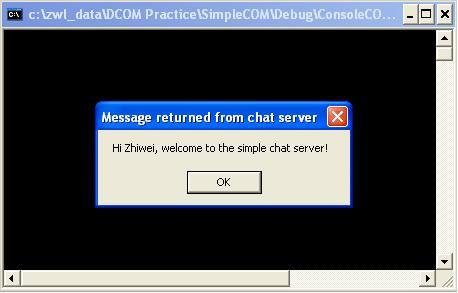
hr = chat -> CallMe(_T("Zhiwei"), &message);
MessageBox(NULL,*message, _T("Message
returned from chat server"),0);
::SysFreeString(*message);
hr = chat -> Release();
}
}
CoUninitialize();
return 0;
}
Finally, you need to set the "ConsoleComClient" as the "StartUp
project" and compile it. The very last stage of the tutorial is to run the
project and you'll see a window pop up with the welcome message.